Request-Reply Workflow
Overview
There are three basic types of workflows: Normal, Request-Reply and Correlated. This sample shows a Request-Reply workflow that accepts a promotion code on the text property of the incoming ESBMessage and replies with a new ESBMessage where the text property contains the discount corresponding to the promotion code. A Request-Reply workflow is executed once for each message sent to the topic associated with the Workflow Endpoint.
Running the Sample
Open the Sample
This sample contains a Neuron ESB Configuration as well as this documentation page. To open this sample, see the topic Using the Neuron Samples and select the Request-Reply Workflow sample. This sample requires a configured SQL Server database. See the topic Configuring a Database for the Workflow Samples to setup the database. Don’t forget to start the Neuron ESB Service after configuring the database!
Open the Workflow in Neuron ESB Explorer
Click the Processes tab and double-click the RequestDiscountWorkflow item to show the workflow in the Workflow Designer:

This workflow includes the following Arguments:
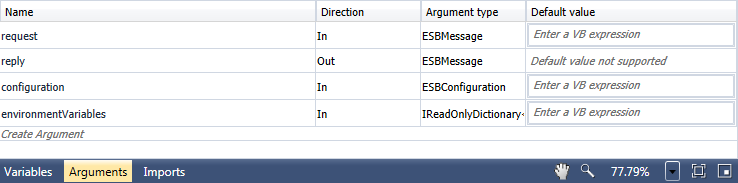
- request – the incoming message sent on the topic
- reply – the outgoing message
- configuration – access to components of the solution including XML and XML documents
- environmentVariables – all environment variables defined in the solution
The workflow defines the following variables (click on the Flowchart activity to view these variables):

- promoCode – the promotion code passed in the text property of the incoming ESBMessage (i.e. request.Text)
- discount – the discount value returned in the text property of the outgoing ESBMessage (i.e. reply.Text)
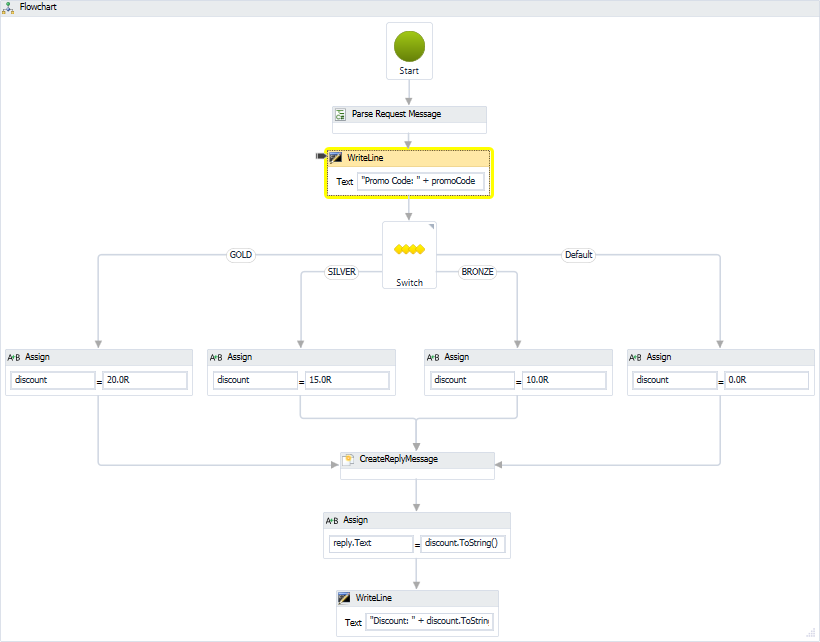
This workflow uses the flowchart layout.
- The StartNode activity is the entry point into the workflow.
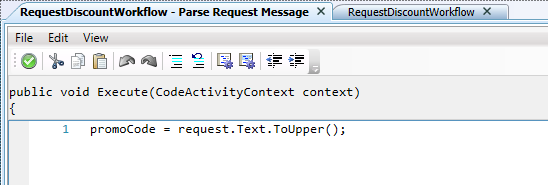
- The CSharpCodeActivity parses the incoming request text, converts it to upper case and assigns it to the promoCode variable. To view the code window, select the Parse Request Message activity and click on the ellipsis for the Source Code property:
- The first WriteLine activity logs the text to the Output panel in Neuron Explorer while testing and to the log file while executed through the Neuron Test Client and other clients.
- The FlowSwitch activity is configured with promoCode as the expression and will branch to a particular Assign activity based on if the value is “GOLD”, “SILVER”, “BRONZE” or anything else.
- Each Assign activity sets the discount variable to a particular Double value.
- All Assign activities flow into the CreateReplyMessage activity which takes the incoming request argument and creates a new message based on that message. The new message is assigned to the reply argument.
- The next Assign activity sets the reply.Text property to the value of the discount variable.
- The final WriteLine activity logs the discount value.
Test the Workflow in Neuron Explorer
You should still be in the Workflow Designer.
- To run the workflow, click the Test Workflow button on the toolbar
- On the Edit Test Message dialog, enter a text value for the message body (ex: gold, silver, bronze, or copper)

- Click the OK button.
- The Workflow Designer will show the running workflow by highlighting the currently executing activity in yellow:
- The Output panel shows the results:

Executing the Workflow
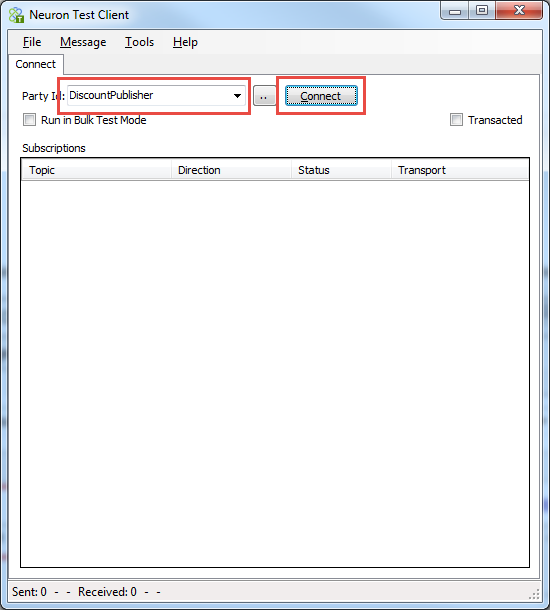
- Open an instance of the Neuron Test Client and connect using the DiscountPublisher:
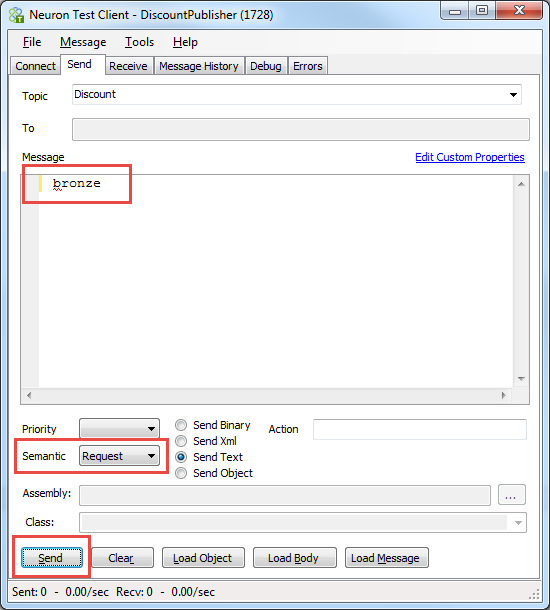
- On the Send tab enter a text message, set the Semantic to Request and click the Send button:
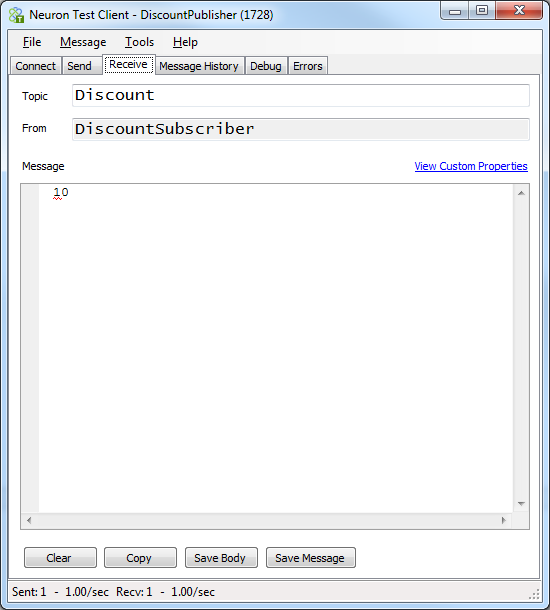
- On the Receive tab you will see the response discount code:
- In Neuron Explorer click the Activity tab and then on Workflow Tracking
- Click on the Run Report button and you will see that one workflow has executed and is in the Completed state:

For every message you send using the Neuron Test Client, a new workflow instance entry will display in the Workflow Tracking screen.