Normal Workflow
Overview
There are three basic types of workflows: Normal, Request-Reply and Correlated. This sample shows a simple Normal workflow that logs the text of the incoming ESBMessage as well as the Workflow Instance ID. A Normal workflow is executed once for each message sent to the topic associated with the Workflow Endpoint.
Running the Sample
Open the Sample
This sample contains a Neuron ESB Configuration as well as this documentation page. To open this sample documentation, see the topic Using the Neuron Samples and select the Normal Workflow sample. This sample requires a configured SQL Server database. See the topic Configuring a Database for the Workflow Samples to setup the database. Don’t forget to start the Neuron ESB Service after configuring the database!
Test the Workflow in Neuron Explorer
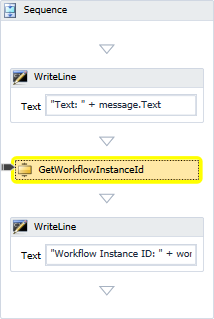
Click the Processes tab and double-click the NormalWorkflow item to show the workflow in the Workflow Designer:
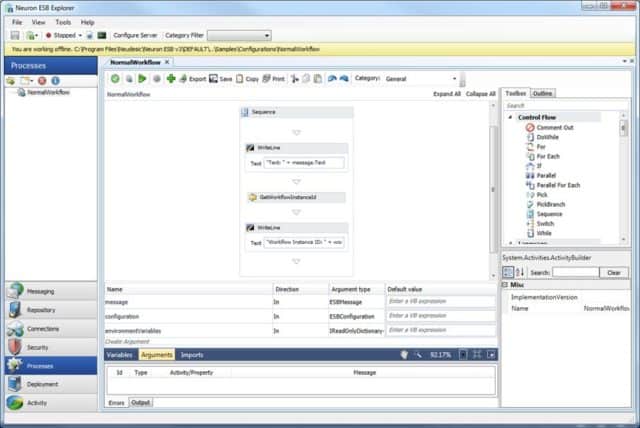
Below the Workflow Designer is a tabbed area for Variable, Argument and Imports and below that an area for Errors and Output. All workflow types (Normal, Request-Reply, and Correlated) have 2 arguments: configuration and environmentVariables. A Normal workflow has a message argument that references the ESBMessage sent on the Topic that instantiated this workflow instance.
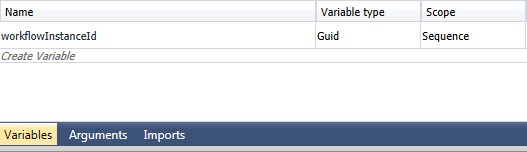
Click on the Variables tab and you will see that this workflow has defined a variable named workflowInstanceId of type Guid (if you don’t see this variable, make sure you click on the Sequence Activity to set the proper scope):
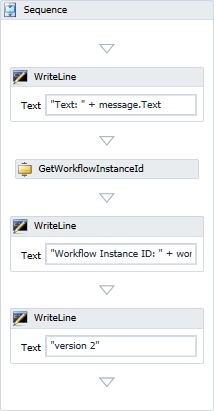
This workflow does the following:
- The first WriteLine activity writes the Text property of the message to the Output panel.
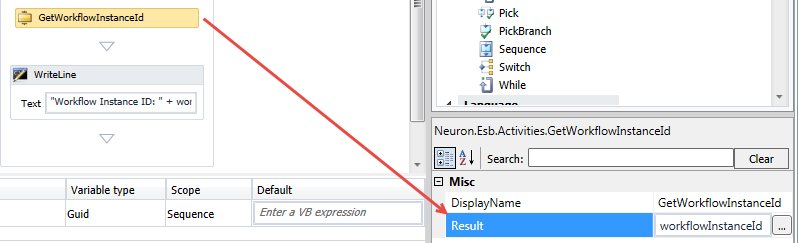
- The GetWorkflowInstanceId activity allows access to the GUID that uniquely identifies this running workflow instance. Select the activity to see that the Result property of the activity is set to the workflowInstanceIdvariable.
- The final WriteLine activity writes the Workflow Instance ID to the Output panel.
Note: When testing the workflow in Neuron Explorer, all WriteLine activities will log to the Output panel. When the workflow is executing in the Availability Group child process of the ESB Service then the log entries are written to the Availability Group log (ex: C:\Program Files\Neudesic\Neuron ESB v3\logs\DEFAULT\20141024T135818\MTUCKER03_Enterprise_Availability Group_NormalWorkflowAvailabilityGroup-2014-10-24.log)
- To run the workflow, click the Test Workflow button on the toolbar
- On the Edit Test Message dialog, enter a text value for the message body (ex: message1)
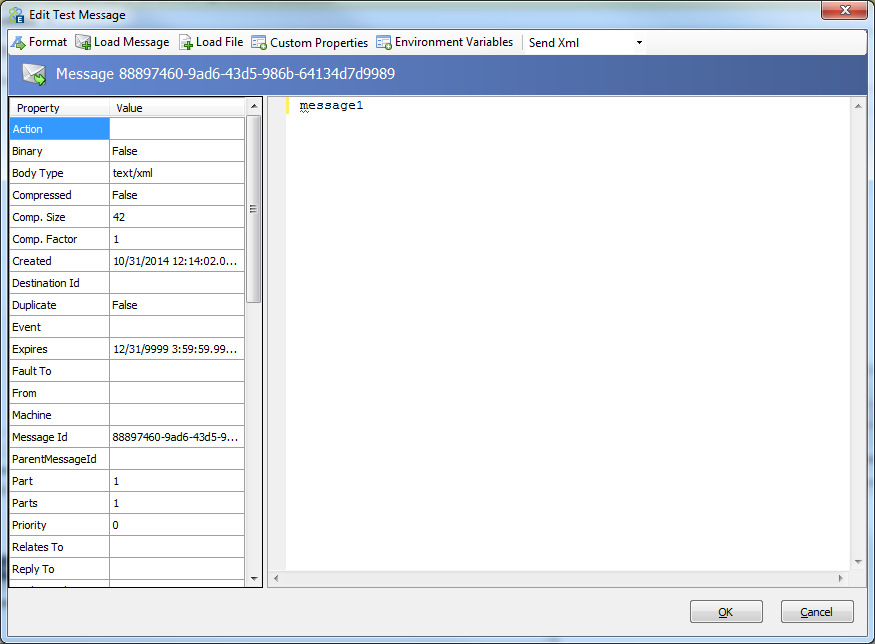
- Click the OK button.
- The Workflow Designer will show the running workflow by highlighting the currently executing activity in yellow:
- The Output panel shows the results:

Executing the Workflow
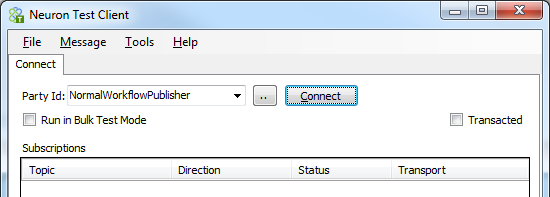
- Open an instance of the Neuron Test Client and connect using the NormalWorkflowPublisher:
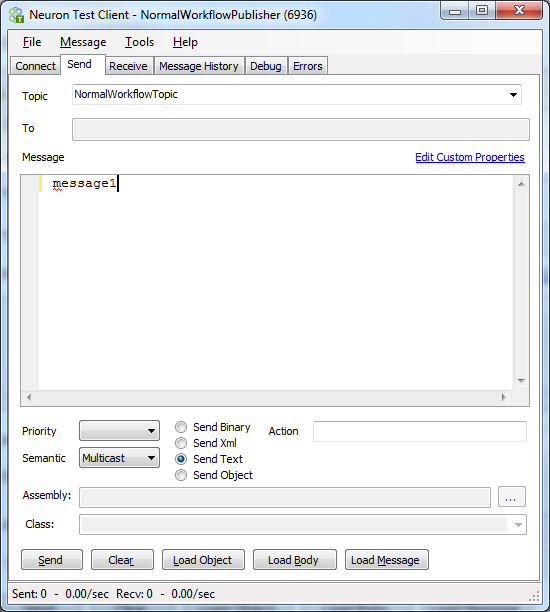
- On the Send tab enter a text message and click the Send button:
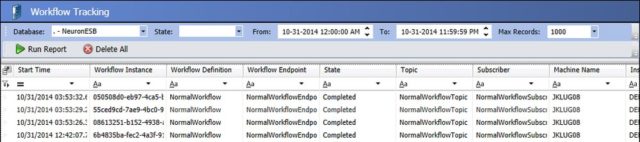
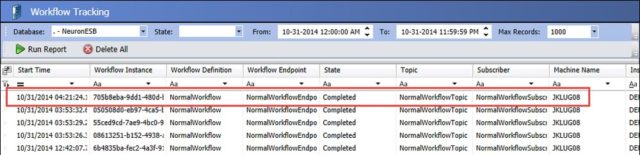
- In the Neuron Explorer click the Activity group and then on Workflow Tracking
- Click on the Run Report button and you will see that one workflow has executed and is in the Completed state:

- The grid has the following columns:
- Start Time – the local time that the workflow started
- Workflow Instance – the unique workflow instance ID for this execution of the workflow
- Workflow Definition – the name of the workflow
- Workflow Endpoint – the workflow endpoint that this workflow is associated with
- State – the execution state of the workflow
- Topic – the topic that messages are being sent on to get to the subscriber associated with the workflow endpoint
- Subscriber – the subscriber receiving messages and associated with a workflow
- Machine Name – the machine that is executing the workflow
- Instance Name – the Neuron instance for the running solution
- Completed Time – the local time that the workflow completed
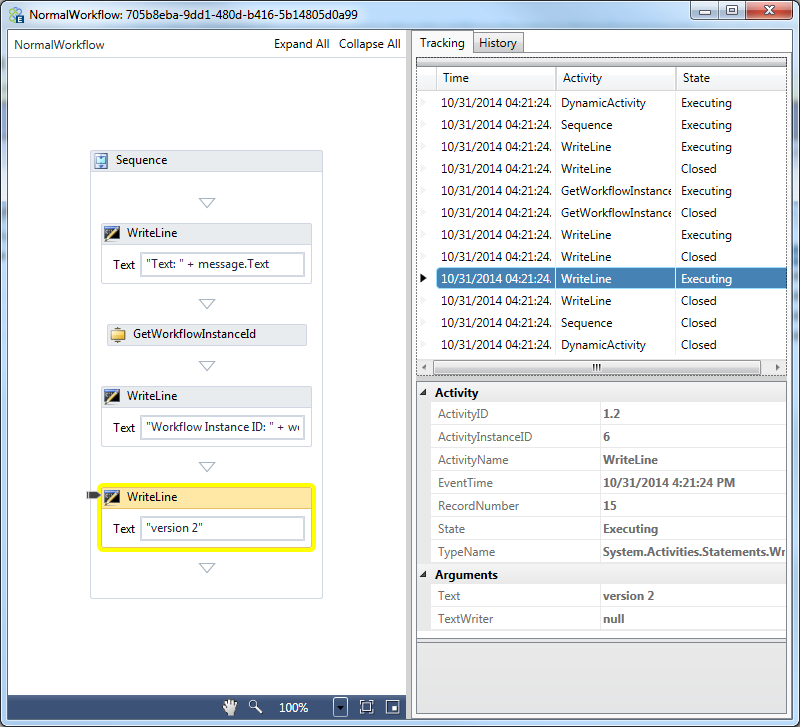
- Double-click row in Workflow Tracking to open the Workflow Tracking Details screen:
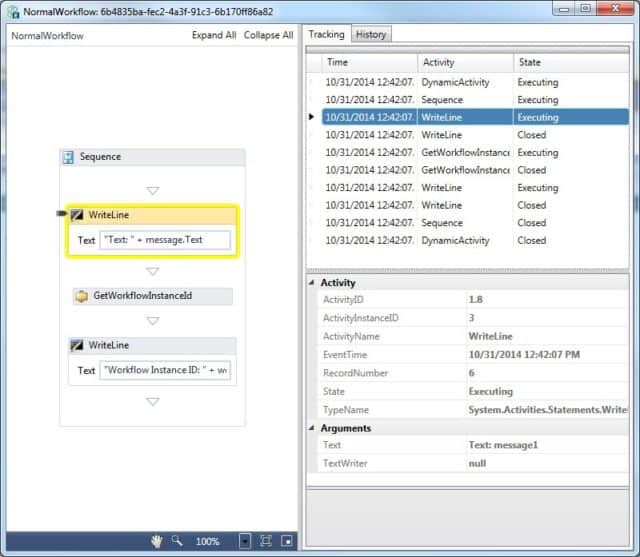
- Clicking entries on the Tracking tab will highlight the corresponding activity and show its properties in the property grid.
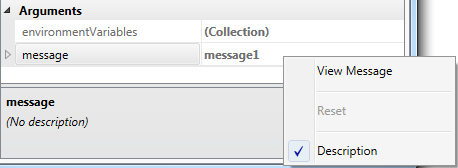
- In the Tracking tab, select the DynamicActivity Executing entry and notice that the property grid shows the message argument:

- Right-click the message and select View Message from the context menu:
- The Message Viewer dialog appears:
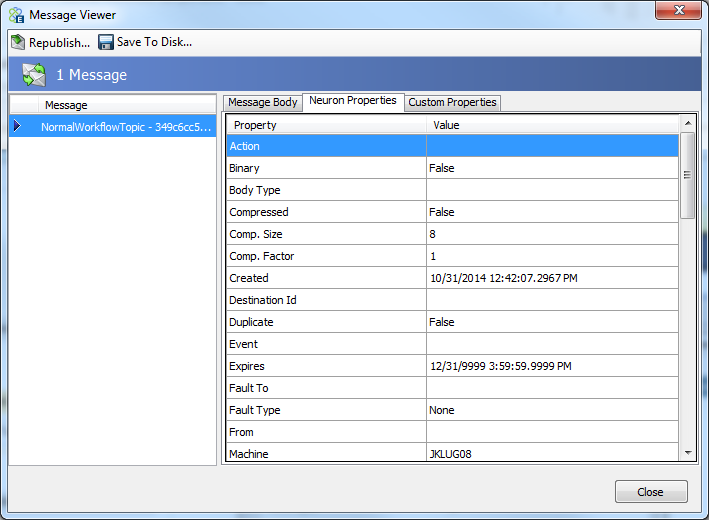
- The Message Body tab will show the message text and the Neuron Properties tab will show various message properties including Source Id, Topic, Workflow Name, Workflow Endpoint Name, and Workflow Instance Id. Close the dialog.
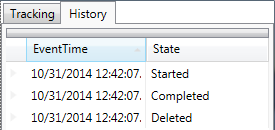
- Click the History tab to see the different workflow execution states. In this example the workflow was Started, Completed and then Deleted from the workflow execution engine:
- Close the Workflow Tracking Detail screen.
- In the Neuron Test Client send a few more messages with different message text values and verify that for every message sent a new entry is added to the Workflow Tracking screen:
- Locate the log file that contains “Availability Group” in its name, open it and find the entries that correspond to the WriteLine activities in the workflow definition:

Viewing Endpoint Health
Click the Activity tab and the Endpoint Health link to open the Endpoint Health screen. Click the Start Monitoring button to see the status of Topics, Availability Groups and Workflow Endpoints:
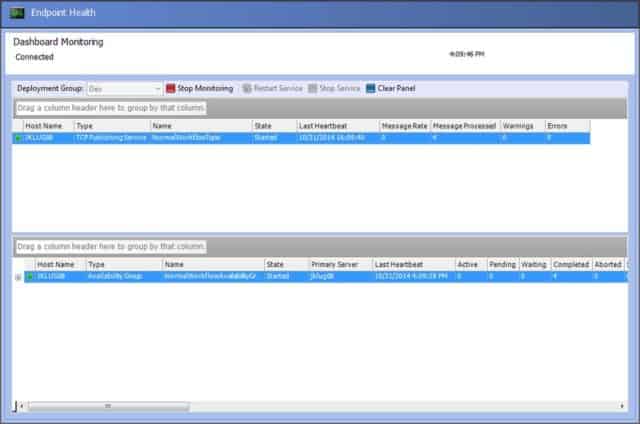
This screen updates periodically to show the current state and heartbeat of the objects. All items have a green status indicator showing that they are started. Since we earlier sent 4 messages using the Neuron Test Client on the NormalWorkflowTopic topic then we see 4 under Message Processed for that topic. The Availability group is hosting a single Workflow Endpoint and the Completed column shows that all 4 workflows instances completed.
When processing many messages and workflow instances you can see how well the system is executing by looking at the Endpoint Health screen.
Updating the Workflow Definition
For a Normal workflow as each message is received by the subscribing workflow a new instance of the workflow based on the current workflow definition is created. When the workflow definition is updated and the configuration saved then a new version of the workflow definition will be used when the next message is sent.
- Open the NormalWorkflow again and add a new WriteLine at the bottom of the Sequence:
- Click Apply to save the Workflow and then the Save button on the toolbar to save the Solution.
- Open the Neuron Test Client and send another message.
- In Neuron Explorer, open the Workflow Tracking screen and click Run Report. You will see a new completed workflow instance:
- Double-click on the row to open the Workflow Tracking Detail screen. Notice that the newly added WriteLine activity is shown indicating that the new workflow definition was used:
In this sample you tested a Normal workflow in Neuron Explorer and executed it using the Neuron Test Client. You were able to see how the Normal workflow creates a new workflow instance for every message published to the topic. You used the Workflow Tracking and Tracking Detail screens to see a summary and details for executed workflows. The Endpoint Health screen was used to verify that the Workflow Endpoint was started and that it completed all workflows. Finally, you could see that changes to a workflow definition were picked up on the next message sent to the workflow’s topic.