Exposing a WSDL in a Client Connector
Overview
Neuron ESB Client Connectors are type-less. Once you create and enable a Client Connector, if you query the endpoint for its WSDL you will receive this default response:
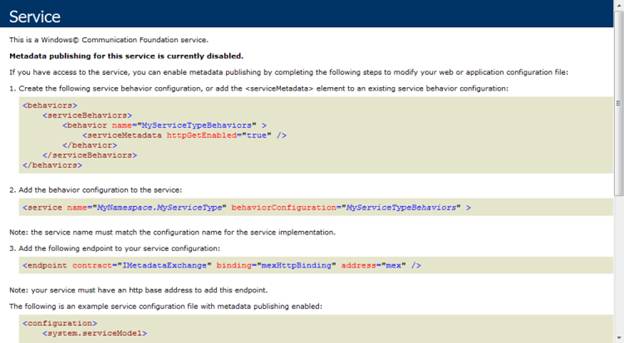
Web client developers typically add calls to Web services by importing a WSDL into their development environment. For example, in Visual Studio they would Add a Service Reference. However, doing that with a default Client Connector would not produce the desired result since no WSDL is exposed.
To address this gap in the development of Web clients to Neuron Client Connectors, Neuron has the ability to expose a WSDL. When configured with a proper WSDL, a query of the endpoint for the WSDL will produce a response similar to this:
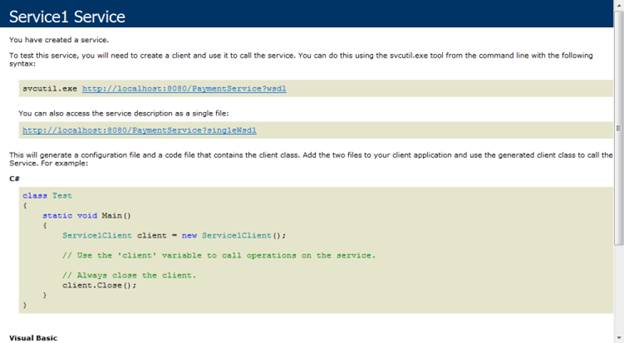
Web client developers can then import the WSDL into their development environment as they normally would.
Before configuring a WSDL for a client connector, the WSDL needs to be added to the Neuron ESB Configuration document repository. This can be done either by using the Import a Service wizard found in Connections->Tasks, or it can be added manually via Repository->Service Descriptions->WSDL Documents. When using the Import a Service wizard, be advised that quite often WCF does not return the entire WSDL when WCF Services are queried for it. The WSDLs will contain imports to external WSDLs and XSDs. The wizard will add all the imports to the Repository, but you will need to manually combine all of them into a single WSDL before exposing that WSDL in a Client Connector.
To configure a WSDL for a Client Connector, in Neuron ESB Explorer go to Connections->Endpoints->Service Endpoints and select the client connector (i.e. PaymentClientConnector). Select the Client Connector tab:
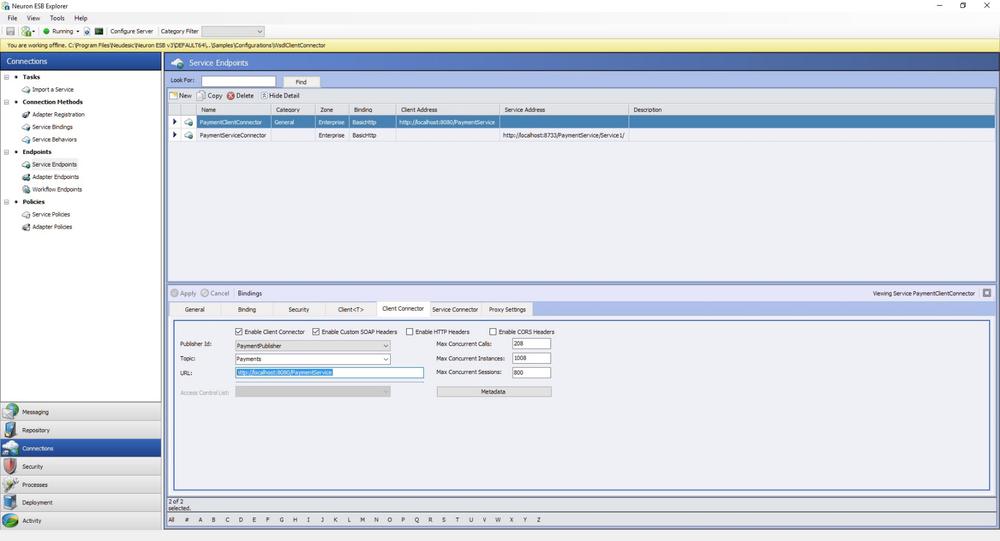
Click the Configure Metadata button:
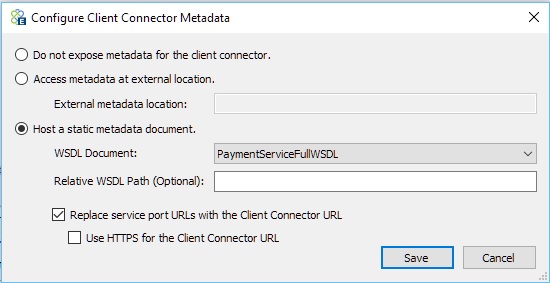
Select the WSDL document from the dropdown list and check the appropriate checkboxes. If you check the option Enable HTTP Get at URL, the WSDL will be exposed at the same URL as the client connector URL. You can optionally provide an additional path to use for querying the WSDL (i.e. set the value to “WSDL”). If you check the option Enable HTTPS GET at URL, the WSDL will be exposed over HTTPS. The option Replace service port URLs with the Client Connector URL will update the exposed WSDL document so that any service URLs in the WSDL will changed to reflect the URL of the Neuron Client Connector. This is useful when the WSDL is imported from an external service location.
For this sample the WSDL is already configured and the steps above do not need to be completed. Feel free to inspect the configured metadata in the PaymentClientConnector service endpoint for this samnple.
Running the Sample
Open the Sample
To open this sample, see the topic Using the Neuron Samples and select the Exposing a WSDL in a Client Connector sample.
Configure the Sample
When launching this sample from the Samples Explorer, a Visual Studio project with a sample Web service is opened along with the Neuron ESB Configuration. This project needs to be built.
Run the Sample Web Service
Start the Visual Studio project by pressing F5.
Create a New Web Client
- Create a new Visual Studio project:
- Open Visual Studio.
- Click on File->New->Project
- Under Installed Templates, select Visual C#->Windows, then Console Application.
- Provide the project and solution details and click OK.
- Add a service reference to the Neuron Client Connector to the project:
- In Visual Studio, right-click on the Project Name (i.e. ConsoleApplication1) and select Add Service Reference
- In the Address text box, type the address of the Neuron Client Connector from the sample – http://localhost:8080/PaymentService and click Go:
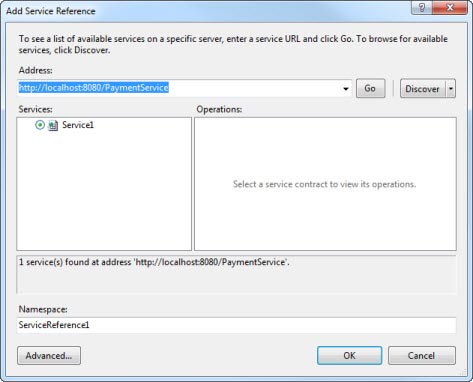
- Click the OK button to add the service reference to your project.
- Modify the Main method to call the Web service using code similar to this:
staticvoid Main(string[] args)
{
   ServiceReference1.PaymentProcessRequest[] paymentRequest = new ServiceReference1.PaymentProcessRequest[1];
   paymentRequest[0] = new ServiceReference1.PaymentProcessRequest();
   paymentRequest[0].Amount = 100;
   paymentRequest[0].OrderId = Guid.NewGuid();

   ServiceReference1.Service1Client client = new ServiceReference1.Service1Client();
   ServiceReference1.PaymentProcessResponse[] paymentResponse = client.ProcessPayment(paymentRequest);

   foreach (ServiceReference1.PaymentProcessResponse response in paymentResponse)
   {
      Console.WriteLine("Response = " + response.Authorized);
   }
   Console.ReadLine();
}
- Test the Web client by building and running the application.