Dynamics CRM XRM Adapter
Overview
Microsoft’s Dynamics CRM software is a powerful customer relationship management platform that can be deployed on-premises or accessed online. The Dynamics CRM XRM adapter lets users send messages to and from Neuron ESB to a Dynamics CRM 2013 server to perform operations whether it is the online or on-premises version. This allows for easy integration between Dynamics CRM and any other system that Neuron ESB can connect to.
Before reading this document
If you are not familiar with Neuron ESB Adapters, take a moment to consult the Adapter Overview. This document assumes you have the following knowledge:
- What adapters are and how they are leveraged in Neuron ESB
- Create an Adapter Endpoint in a Neuron ESB Solution
- Set a Neuron ESB Adapter Endpoint Properties
- Invoke a Neuron ESB Adapter Endpoint
The following documentation shows how to setup the Dynamics CRM Security and User roles needed to use the Dynamics CRM XRM adapter as well as how to add the adapter to Neuron ESB, set the security credentials for the adapter, and create sample messages from the Adapter Metadata Generation Wizard.
Configuring Prerequisites and Adapter
Configure the Domain User
Create a new user for the adapter by following the steps in the topic Create a Domain User.
Create roles in Microsoft Dynamics CRM 2013
The following steps will allow one to create the appropriate security role which can be assigned to the CRM user.
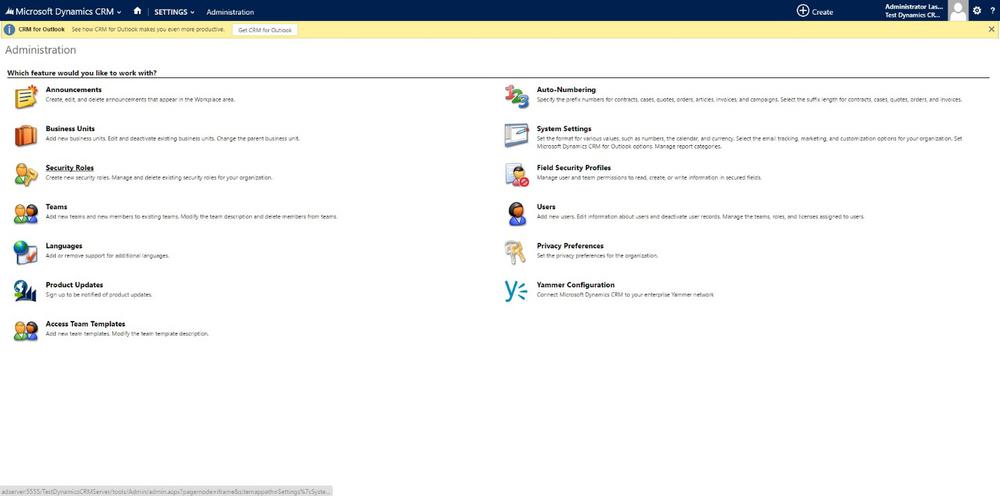
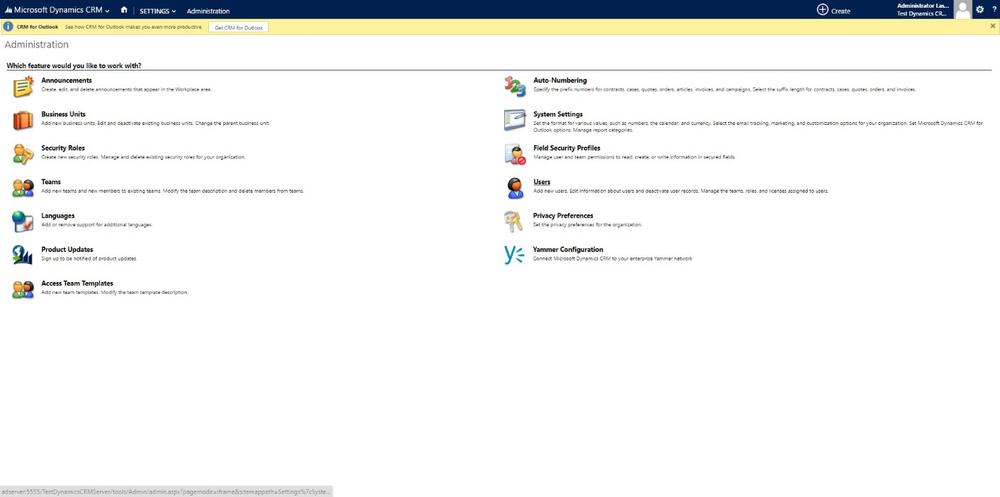
Open CRM with a user having access to creating roles and users in CRM. Then, click on Settings->Administrator->Security Roles.
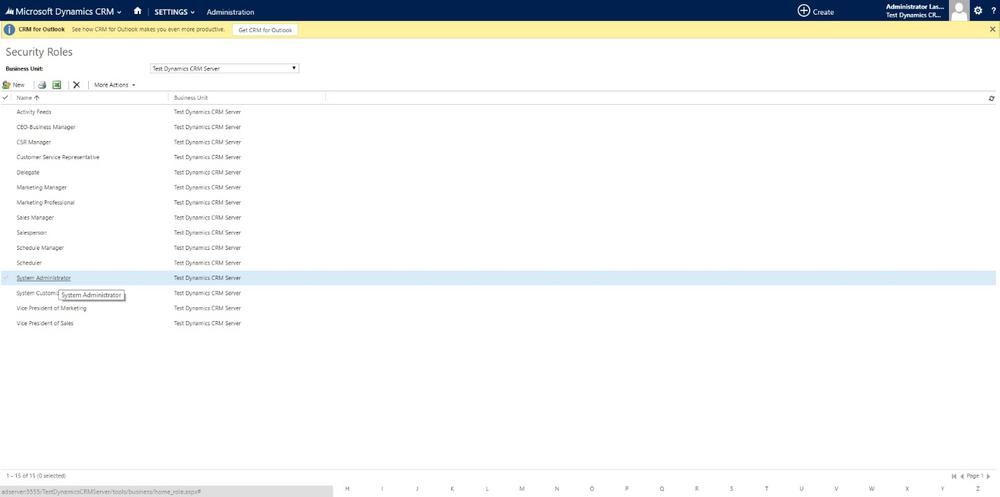
All the security roles will be displayed and one will need to copy the privileges assigned to the System Administrator. Click System Administrator from the roles grid.
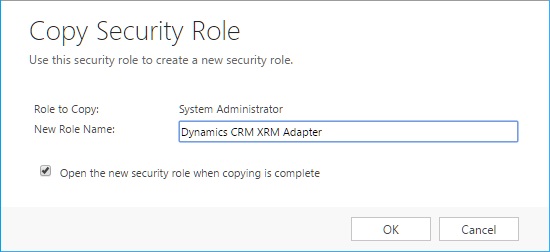
Click on Action->Copy Role
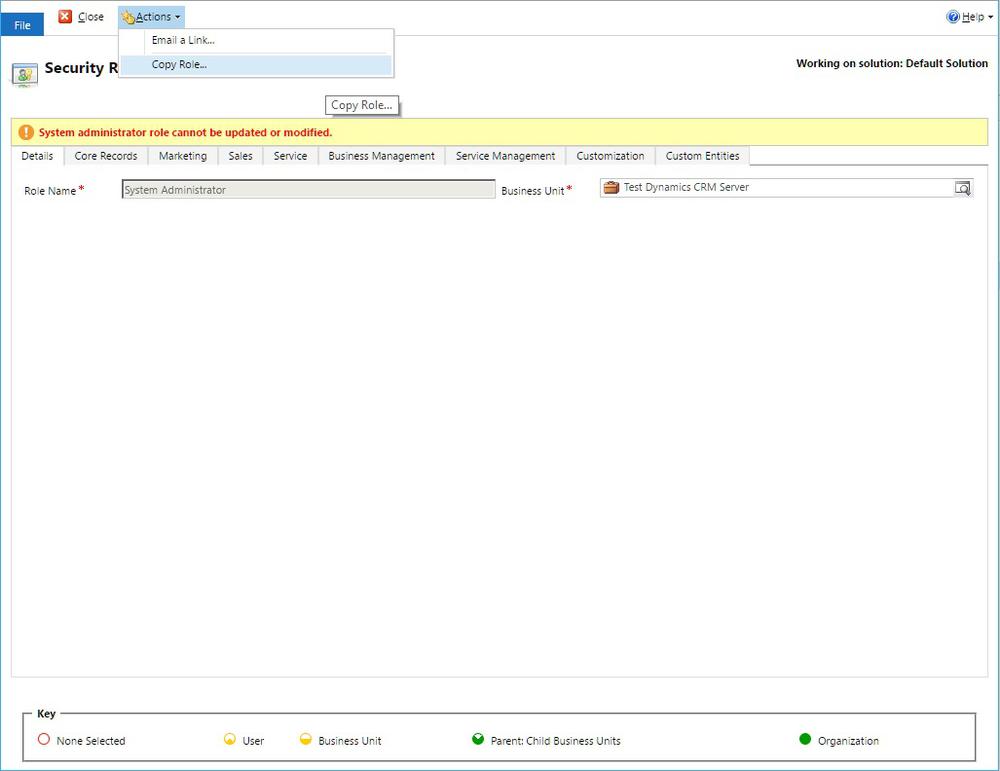
The Copy Role link will open a new link to create the role in CRM. Specify the Role Name and click OK. Make sure the Open the new security role when copying is complete check box is marked.
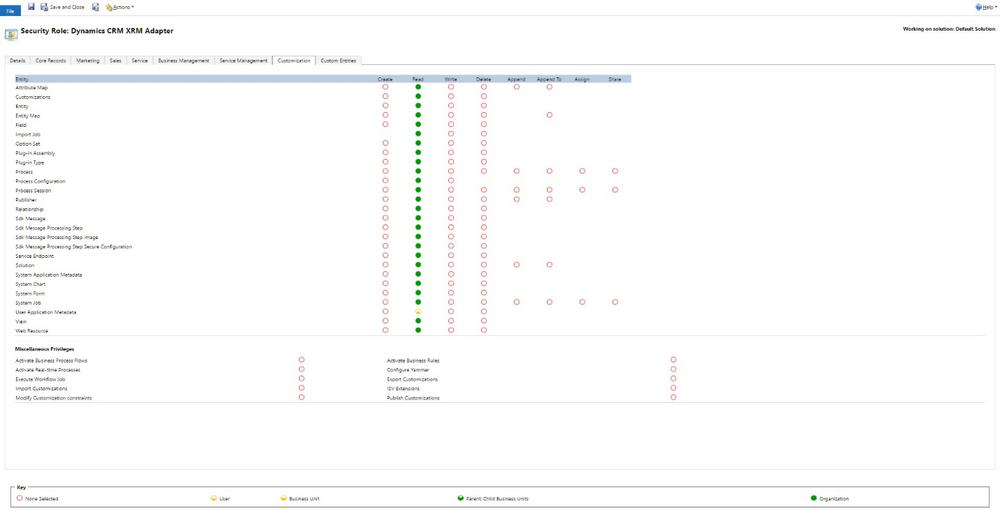
Disable everything on the Customization tab except the read privileges by clicking on the column headers for each column. Also disable the Miscellaneous Privileges.
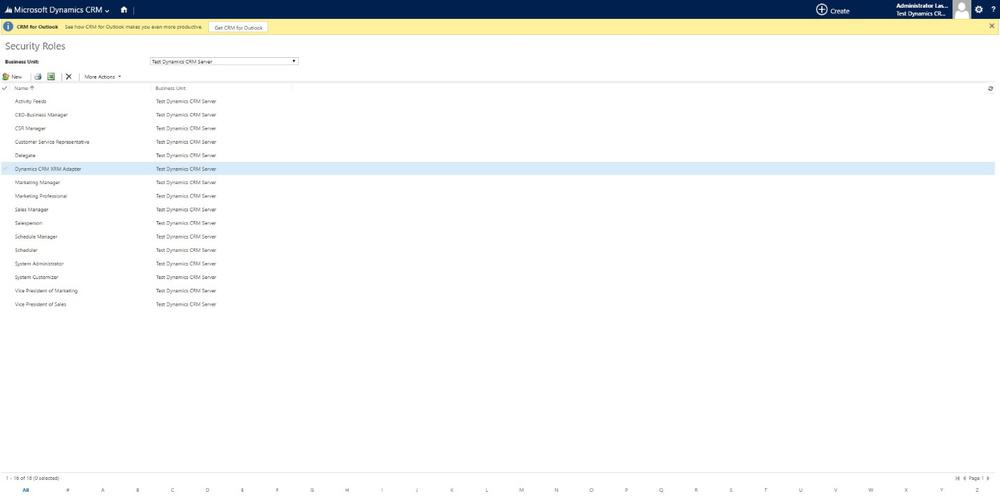
Now you will see the newly created role in CRM’s security roles list.
Create User in Dynamics CRM 2013 and Assign Roles
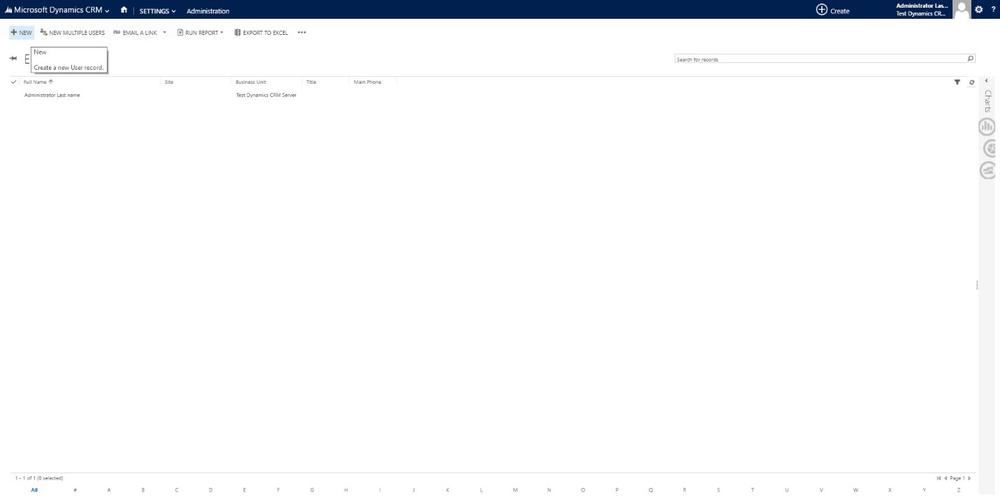
To create a CRM user click Settings->Administration->Users
After clicking the User link, it will open the user grid. Click the New button to create a new user.
The new user page will be displayed. Please enter the User Name of the Active Directory user created in the Configure the Domain User step and move the focus off the control. Doing this will cause the details to be retrieved from active directory. Also, if a Last Name was not given to the user, add a Last Name to the user by clicking on Full Name.
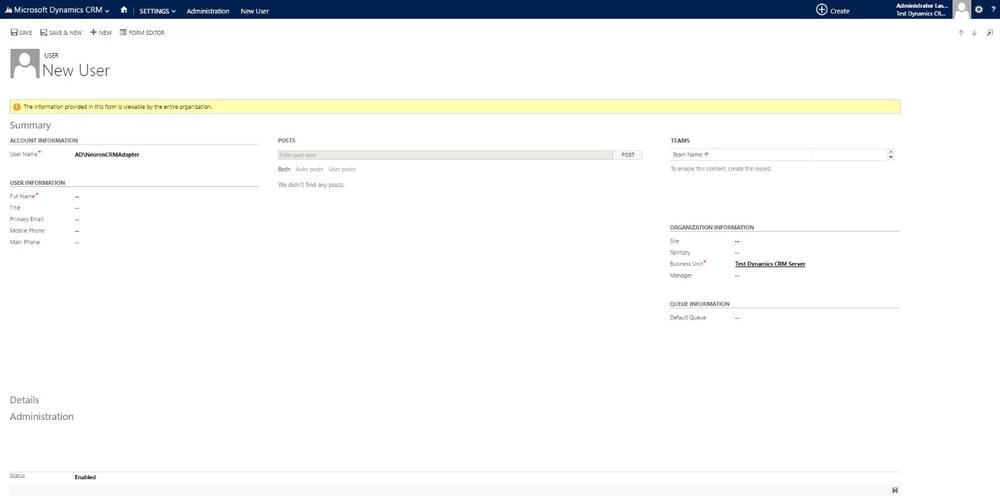
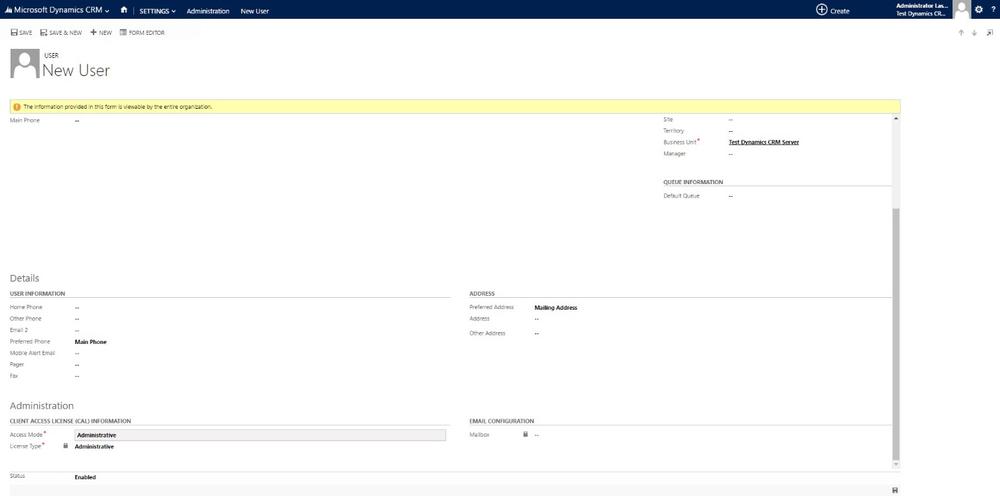
Select the access mode Administrative, which will give full rights to the newly created user
.
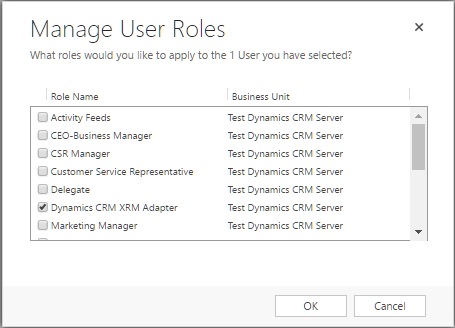
Click the Save button which will create the user. Then, click the ellipses button and then the Roles link to assign roles to the user.
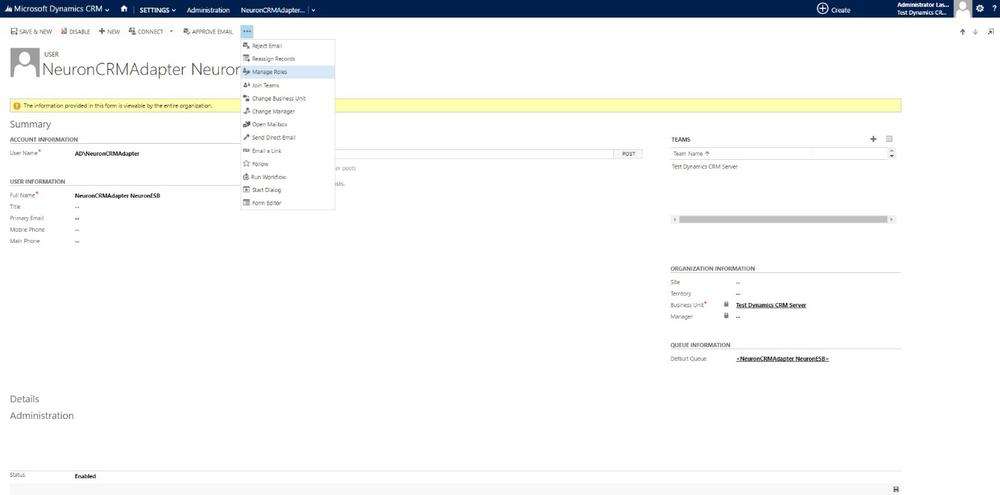
Select the Security Role that was created for the adapter earlier in the instructions and then click OK.
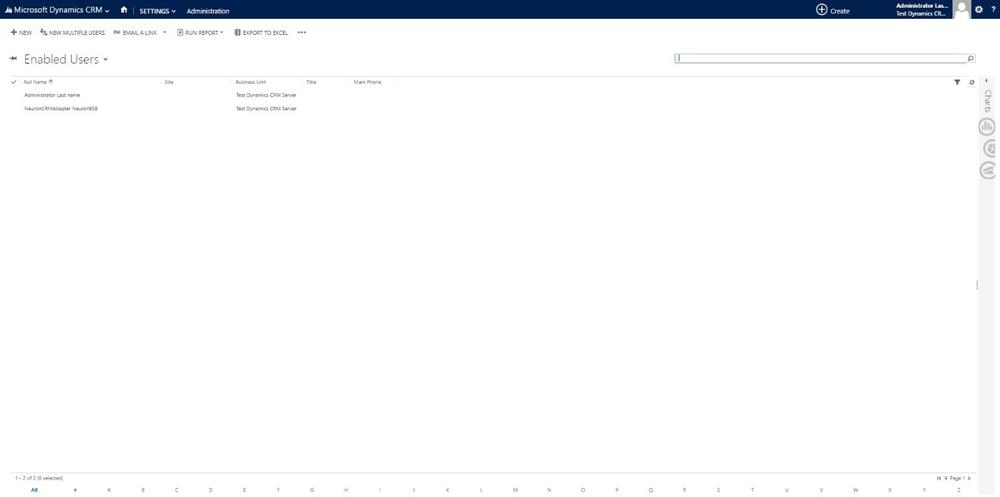
Go back to the Users grid and the user created should appear.
Configure MS CRM Web Service User Credentials
There are two ways user credentials can be configured to call CRM Web services.
- User can enter CRM credentials into the adapter’s properties grid.
- User can add the CRM user to the Security->Authentication->Credentials list.
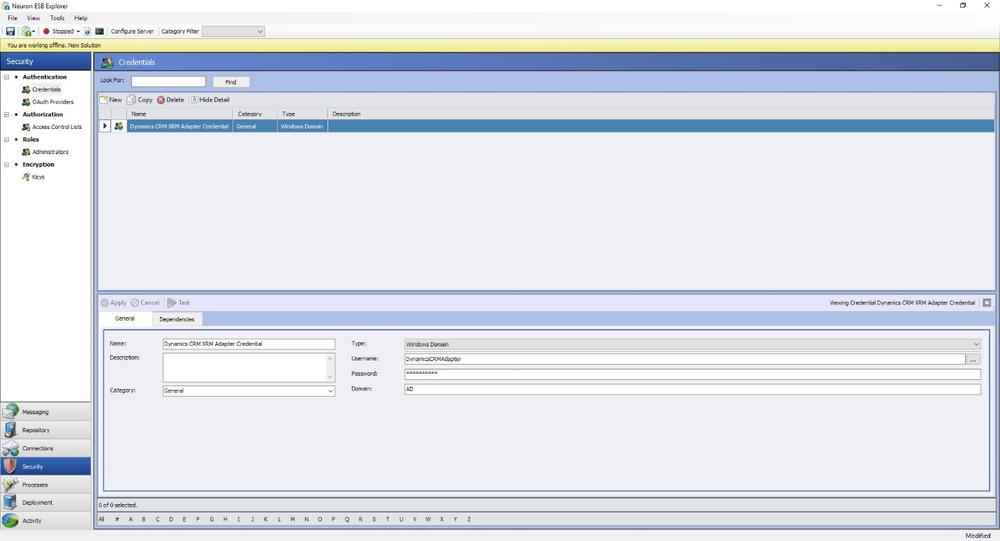
Open the Neuron ESB Explorer and navigate to Security->Authentication->Credentials.
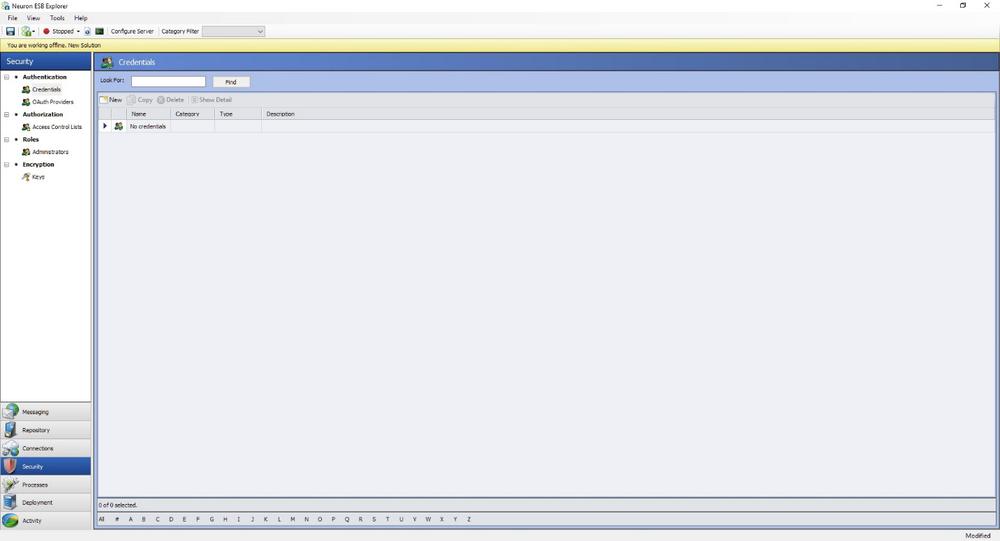
Click on the New button to add CRM user credentials. Select Windows Domain from the type list, choose any user using the user selector by clicking the ellipses button next to the Username text box, and then fill in the correct user name, password, and domain information, then click apply. Save the Neuron configuration.
Configuring the Dynamics CRM XRM Adapter
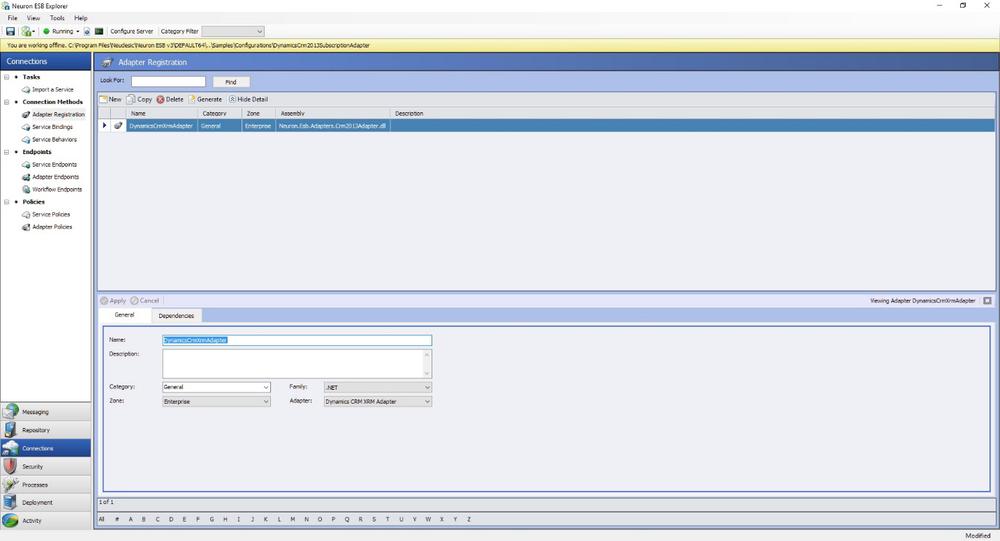
Use Neuron ESB Explorer to navigate to the Connections -> Adapter Registration view. If not using the sample configuration and the Dynamics CRM XRM adapter does not already appear in the adapters list, then click on the New button and then choose the Dynamics CRM XRM Adapter assembly from the Adapters drop down menu (note that the assembly dll file is actually named Neuron.Esb.Adapters.Crm2013Adapter.dll). Give the adapter an appropriate name, then click Apply.
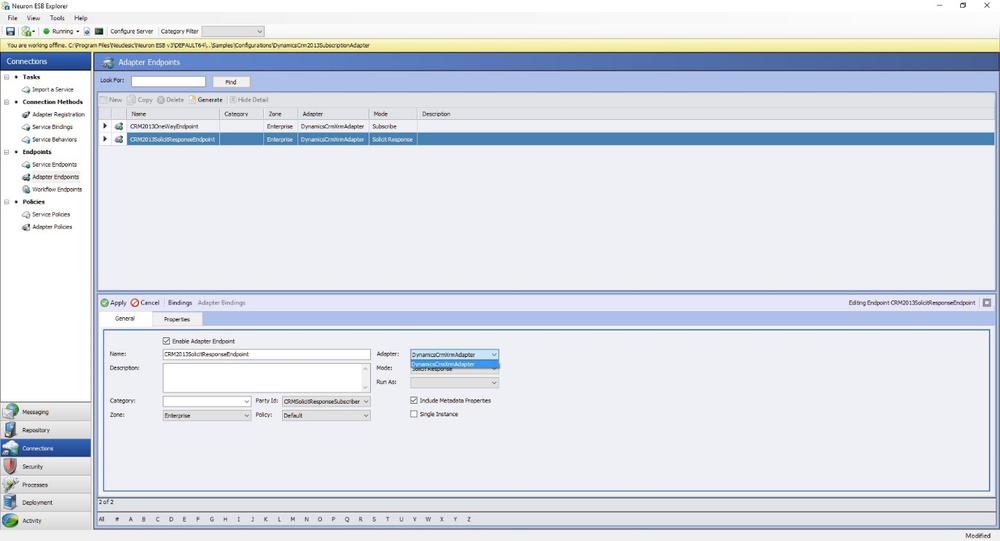
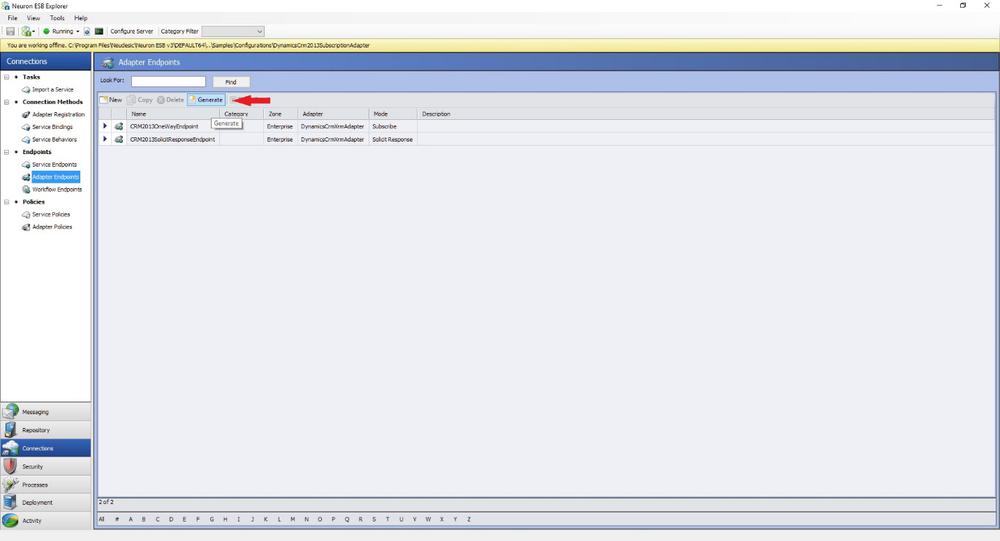
Now, select Adapter Endpoints to create an endpoint based on the Dynamics CRM XRM adapter that was just registered. Click the New button and select the adapter from the adapter drop down list (the adapter will appear as the name that was given to it when it was registered). Set the mode to Subscribe or Solicit Response and configure the Party Id which is the party used to receive messages from Neuron (must add a Subscriber party from the Messaging tab if not using the sample configuration).
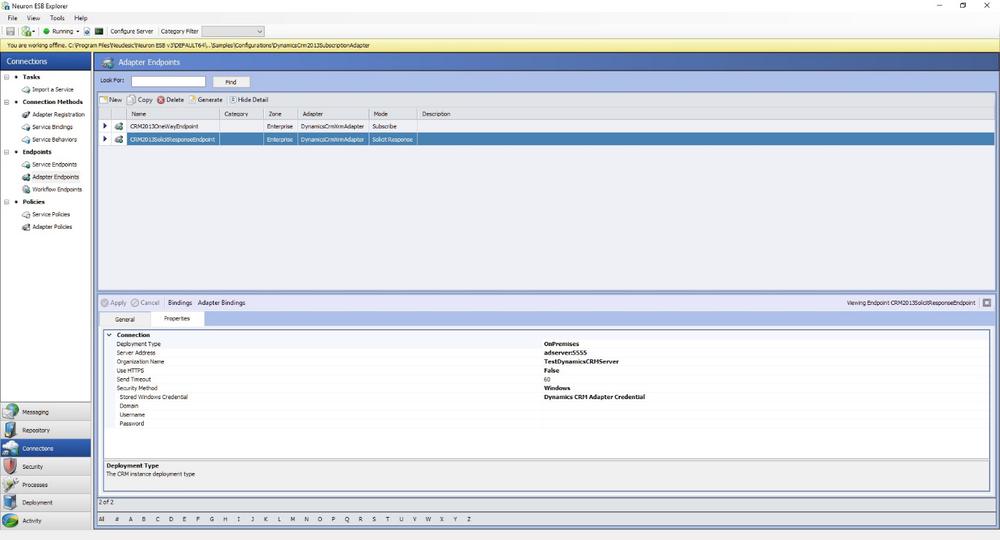
In the adapter’s properties tab, enter the properties for the CRM server being connected to, choose Windows for the Security Method property, and select the credential created earlier for the Stored Windows Credential property.
Click apply and save the configuration.
Troubleshooting
Enable CRM tracing
Microsoft Dynamics CRM lets you create trace files that monitor the actions that are performed by Microsoft CRM. Trace files are helpful when you have to troubleshoot error messages or other issues in Microsoft CRM.
Please refer to the following link for information about enabling tracing in Dynamics CRM: https://support.microsoft.com/en-us/kb/907490
Enable Neuron Tracing
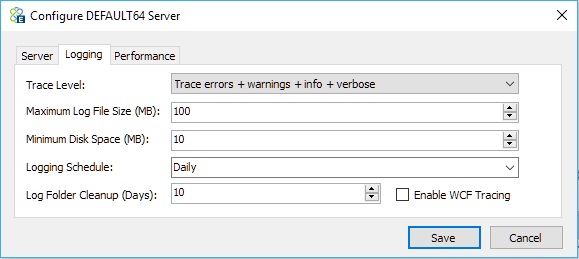
Open Neuron ESB Explorer and click on Configure Server -> Logging to configure the trace level for the Neuron ESB Service. Note: All log files are written to the logs directory in the installation path (e.g. C:\Program Files\Neudesic\Neuron ESB v3\logs if Neuron ESB was installed in the default location)
The Neuron ESB Service will have to be restarted to apply any changes with the trace level.
Supported Modes
The Dynamics CRM XRM Adapter supports both Subscribe and Solicit Response modes. In Subscribe mode, the adapter sends messages/commands from the bus to the CRM server, with no response expected. In Solicit Response mode, the adapter sends messages/commands from the bus to the CRM server, expecting a response back from the server.
Sample Messages/Adapter Metadata Generation Wizard
The Dynamics CRM XRM Adapter supports the Adapter Metadata Generation Wizard, which creates sample messages and schemas in Neuron Explorer’s Repository. To use this feature, click the Generate button in the Adapter Endpoint menu.
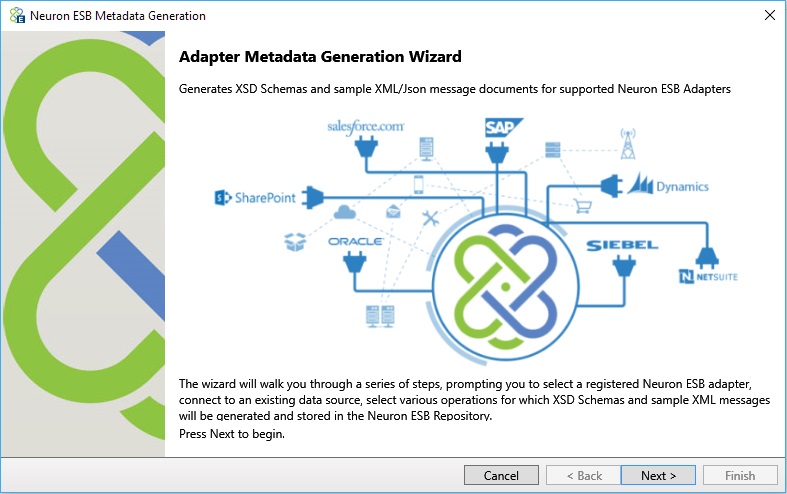
This will bring up the wizard. Click Next.
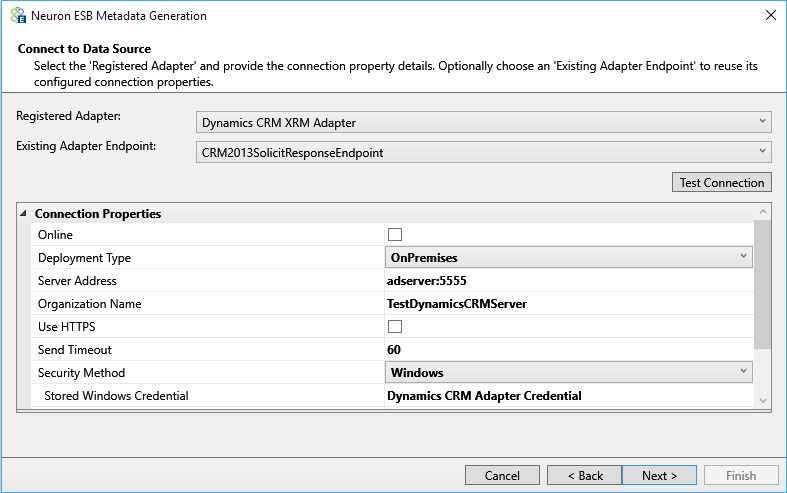
Choose the Dynamics CRM XRM Adapter under the Registered Adapter drop-down menu and choose the Adapter Endpoint that was created earlier. This will populate the Connection Properties with the adapter endpoint’s properties. Click Test Connection to test if the adapter can connect to the CRM Server. Click Next if the connection is successful.
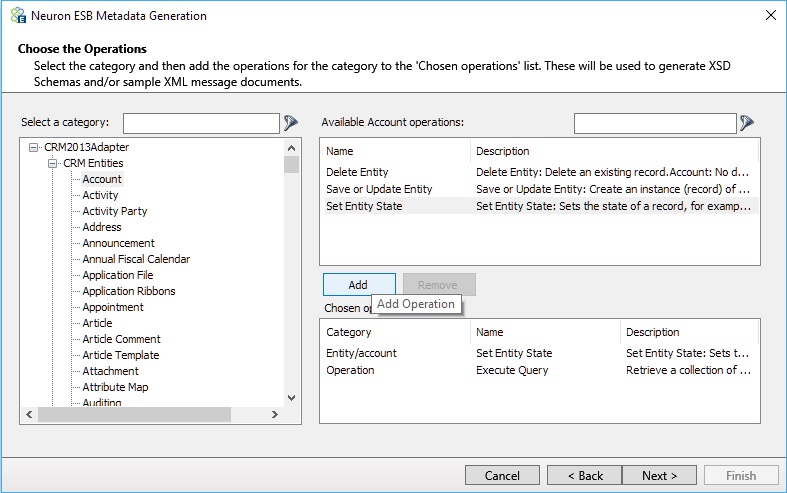
Next, select which operations to create sample messages for by clicking on the Category of operation (i.e. the CRM entity to create a sample message for), choosing which operation to add, and clicking the Add button for each operation desired. Click Next after adding all desired operations.
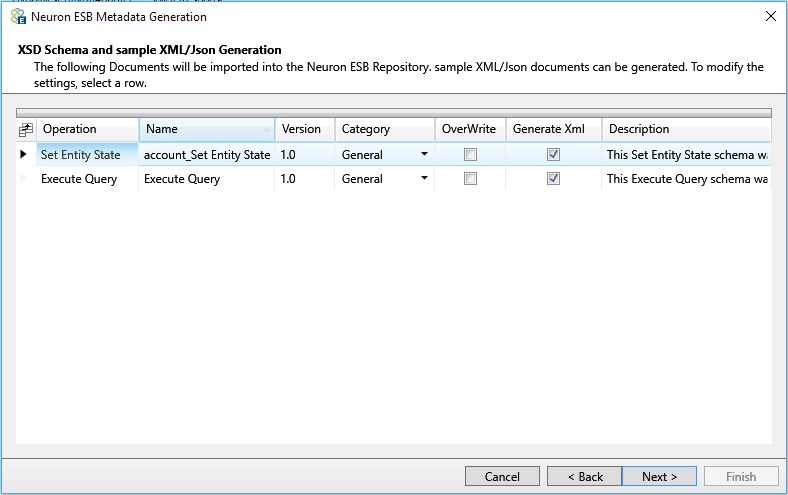
Make sure the Generate Xml box for each operation that a sample XML message should be generated for is checked. The XML Schemas are automatically created when using this wizard, but for sample XML messages, the Generate Xml box must be checked. The Overwrite check boxes will determine if an existing document in the repository will be overwritten with the new schemas and sample XML. Click Next.
A summary of the changes will be displayed. Click Finish.
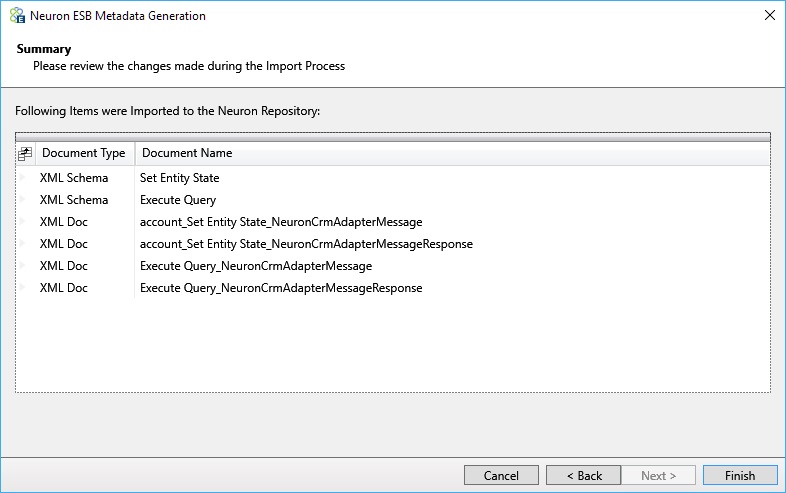
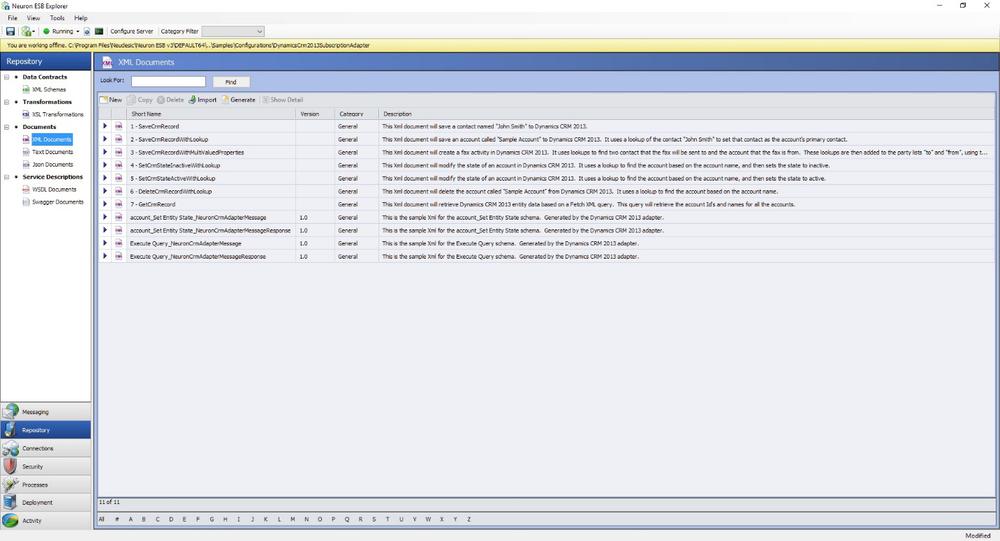
Go to the Repository tab in Neuron Explorer to find the sample messages and schemas generated by the wizard. The generated schemas are in the XML Schemas menu and the sample messages are in the XML Documents menu. Note that the bottom four entries in the XML Documents repository are the samples that were generated by the wizard. The other XML Documents are a part of the sample configuration.