Transactional Process
Overview
This sample demonstrates how to wrap process steps in a transaction. Transactions are used to ensure that, if a process fails to execute, any individual step of that process (that supports transactions or use XA resource compliant transaction resource managers) that had already completed prior to the error occurring is “rolled back” to its original state. Transactions are commonly used in database processes.
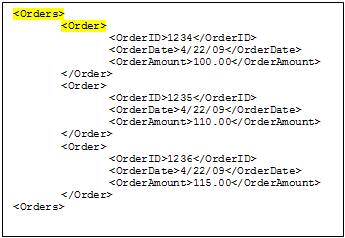
For example, a large purchase order may contain many “Order” records, each with corresponding Customer and Product information, which must be entered as separate operations into multiple tables. A purchase order may contain 10 orders to be entered and on the 9th record there is a database error due to corrupt data the process will fail and only part of the purchase order will have been saved making it unusable. The desired result would be to rollback all of the previous records stored if any failure occurred. This can be accomplished using transactions. In Neuron Processes there is a Transaction process component that can be used to wrap other steps and execute them in one atomic transaction.
Process Components Demonstrated:
- Exception (Try/Catch/Finally)
- Transaction
- Code
- Store Table Query Trace
Solution
This sample consists of two processes. One process will demonstrate using process steps non-transactionally and the other will execute the same steps within a Transaction process step. By demonstrating these two scenarios it will be easy to understand the value of the Transaction process step especially when dealing with processes such as database queries.
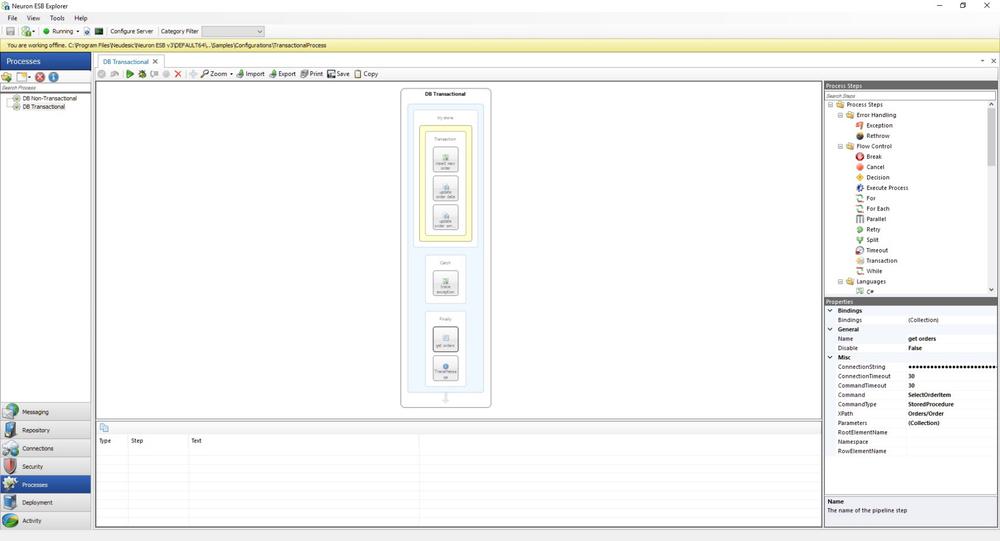
The DB Non-Transactional process shown in Figure 1 will be used to demonstrate what happens when database processing is done non-transactionally and errors occur. The DB Transactional process shown in Figure 2 will run the identical steps except the steps executing database storage will run inside a Transaction process step.
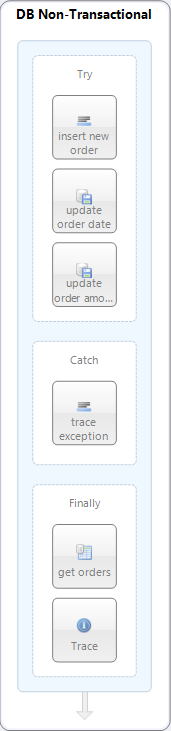
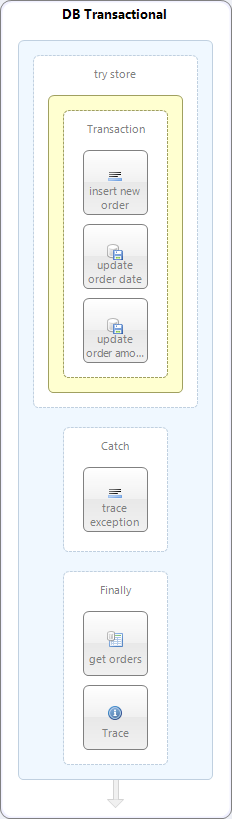
Both processes have an Exception Process Step used as a container for all the process steps.
Within the Try Execution Block there are 3 process steps.
- The first step is a Code step name “insert new order” which is used to create 3 new database Order records from the incoming message. The records inserted in this step will use only the OrderID node data from the incoming message and use default values for the other fields.
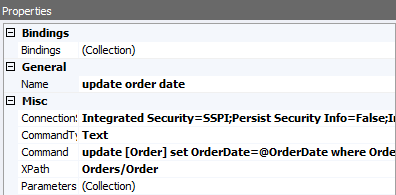
- The second step is a Store process step named “update order date” which is configured to extract the OrderDate node data and update each of the records that was inserted in the insert new order process step with the date field information.
- The final step that is within the Try Execution Block is a Store process step named “update order amount” which is configured to update the OrderAmount field. This final Store step will be used topurposely cause an error so that the Transaction step can be demonstrated. All properties for the update order amount step are configured correctly except for the connection string which will cause an error when it is executed.
In the Catch Execution Block is a single Code process step, “trace exception”. This step will be used to display the error message produced from the execution of the errant update order amount step in the Try Execution Block within the Trace Window. When we run this sample we will use the Test feature of the Neuron Process Designer. Testing in the designer allows you to see each step being executed. Trace messages can be added to the execution using a Trace process step and these messages can be seen in the Process Designer’s Trace Window during testing.
The Finally Execution Block contains 2 process steps.
- The first step is a Table Query process step named “get orders” which will be used to extract all of the records from the database that were inserted during the execution of the previous storage steps. The get orders step is configured to use the OrderID node fields from the incoming message as parameters to a stored procedure which will return the record with that OrderID value.
- The last step in the process is a Trace process step which will be used like the Tracestep found in the Catch block. The Trace step is used to display the resulting message from all other previous steps. The message will be displayed in the designer’s Trace Window when using the Neuron Process Designer test feature.

Running the Sample
Prerequisites
- Database creation – A SQL database is required to run this sample. To create the database and table associated with this sample run the SQL script titled “MessageData Creation Script” found in the Appendix section of this document.
- For each process, verify the connection string used in the Store process steps named “update order date” and “update order amount” as well as the Table Query process step named “get orders”. Follow the instructions titled “Verify Connection Strings” found in the Appendix section of this document.
- The “Distributed Transaction Coordinator” service must be running. To start the service, run “services.msc” from the Windows “Run” box and start the “Distributed Transaction Coordinator” service if it is not running already.
Open the Sample
To open this sample, see the topic Using the Neuron Samples and select the Transactional Process sample.
Run the Sample
- From the Repository tab in Neuron Explorer copy the test message OrdersTestMessage from the Xml Documents area.
- Navigate to the Process Designer by selecting the Processes tab in the left panel of Neuron Explorer.
- Select the DB Non-Transactional process from the list on the left of the designer.
- On the Process Designer toolbar click the Test button
 . This will open the Edit Test Message Dialog shown in Figure 6.
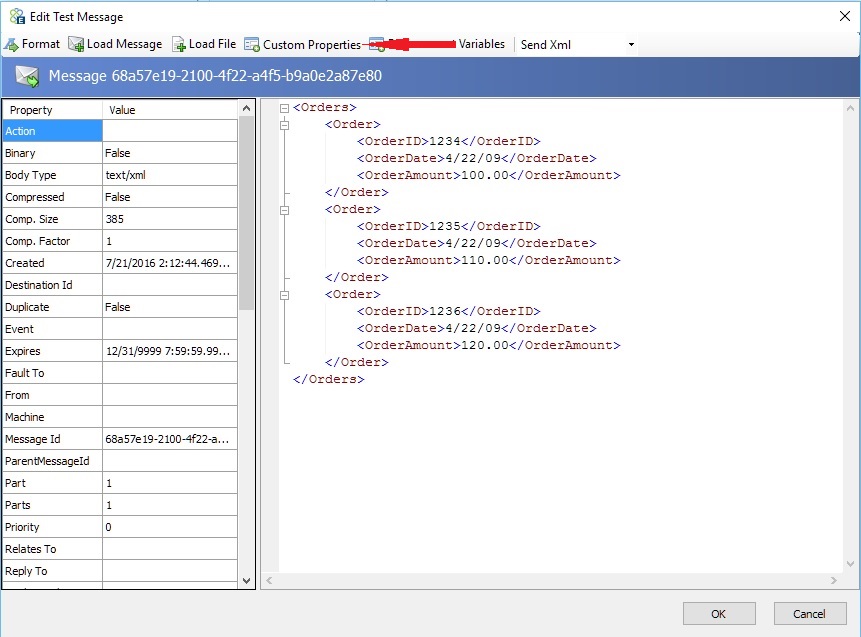
- Paste the test message retrieved in step 1 into the message field of the Edit Test Message dialog as shown in Figure 6.
- Within the Edit Test Message dialog, click the Edit Custom Properties link label shown in Figure 6 to bring up the Custom Properties dialog as shown in Figure 7.
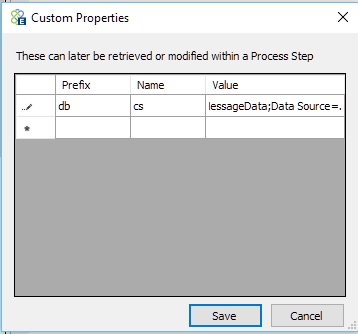
- Enter the same connection string used in the Store and Table Query step that was set in the prerequisite for the value for the “db.cs” custom property.
- Click the OK button to close the Custom Properties dialog.
- Click the OK button on the Edit Test Message dialog. Once the dialog is closed the process will begin execution.
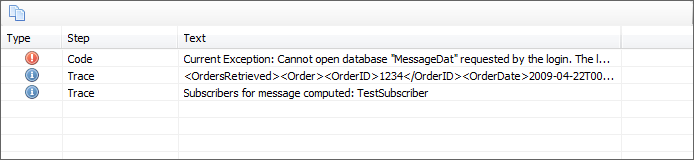
- As the process runs each step will be highlight in green as it is executed. In addition, any trace messages will be visible in the Trace Window. As you visually follow the execution not the sequence of steps. When the process completes, the Trace Window should look similar to what is shown in Figure 8.
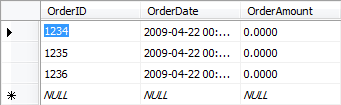
- Check the database using a tool such as SQL Server Management Studio to verify the records were stored in the Order table of the MessageData database. Note that the OrderID and OrderDate fields have the correct values found in the original message. Note that the OrderAmount field does NOT have the correct value. This is because only the Code step and the first Store step found in the Try Execution Block of the process executed without error. The Store step that was configured to update the records with the correct amount failed rendering all of these records invalid. See Figure 9 below.
Executing Transactionally
- Delete the records in the database.
- Select the DB Transactional process from the list on the left of the Process Designer.
- Click the Test button on the designer toolbar as described in step 3 under the “Run the Sample” section of this document. This will open the Edit Test Message dialog again. The test message and custom properties should still be set. If not, repeat steps 4-8 under the “Run the Sample” section.
- Click the OK button on the Edit Test Message dialog. The process will run and you can follow the execution as described in step 9.
- The final screen capture of the Trace Window after executing the transactional version of the process is shown in Figure 10.
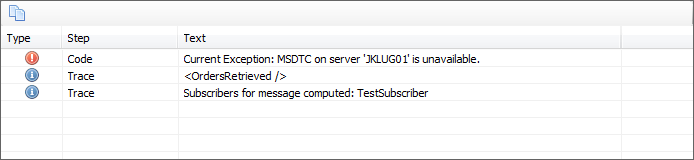
- Check the database table as described in step 10 and note that there are no records stored. The Transaction component rolled back the process and the first 2 database processes were “rolled back”. Also note the final message as displayed in the Trace Window showing no records retrieved.
Configuration Notes
All processes with the exception of the Code process step are configured by selecting and setting their properties in the property grid located at the bottom right of the process designer. The Code process step is configured by selecting the “Edit” menu item that is available when right-clicking the Code step in the process designer. See the process documentation for more information.
Appendix
MessageData Creation Script
 USE [master]
 GO
 CREATE database MessageData
 GO
 USE [MessageData]
 GO
 CREATE table [Order] (OrderID int, OrderDate datetime, OrderAmount   money)
 GO
 CREATE procedure StoreOrderItem (@OrderID int, @OrderDate datetime,   @OrderAmount money)
 AS
 INSERT INTO [Order] (OrderID, OrderDate, OrderAmount) VALUES (@OrderID,   @OrderDate, @OrderAmount)
 GO
 CREATE procedure SelectOrderItem (@OrderID int)
 AS
 SELECT OrderID, OrderDate, OrderAmount FROM [Order] WHERE OrderID=@OrderID
 GO
 CREATE procedure SelectOrderItemXml (@OrderID int)
 AS
 SELECT OrderID, OrderDate, OrderAmount FROM [Order] WHERE OrderID=@OrderID
 FOR XML AUTO, ELEMENTS
 GO
Verify Connection Strings
- Open Neuron Explorer and navigate to the Processes section.
- Select the DB Non-Transactional process listed in left panel.
- Select the Store process step named “update order date”.
- In the property grid select the ConnectionString property and click the ellipsis button on the right of the property value.
- The Connection Properties dialog will open as shown below in Figure 12
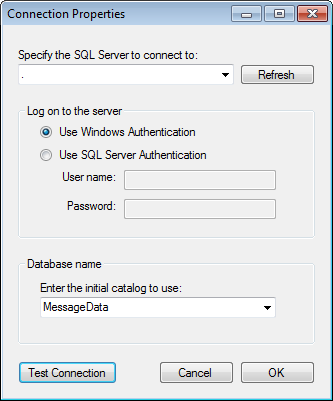
- Make sure the SQL Server and Database Name is correct then click the Test Connection button to assure that the connection string is correct.
- Click the OK button on the Connection Properties dialog to save your changes.
- Repeat steps 3- 7 for the Table Query process step named “get orders” and the Store process step named “Update Order Amount”.
Note: The Database name used in the “Update Order Amount” step is purposefully set to an incorrect value – “MessageDat”. When you test the connection you will be notified that the database connection test failed. This is expected. - Save the changes to the process and the configuration by first clicking the Apply button at the top of the process designer then the Save button on the Neuron Explorer toolbar.
- Select the DB Transactional process listed in the left panel.
- Repeat steps 3-9 for the DB Transactional process.